Thank you for sharing the coastal love:
For your convenience this post may contain affiliate links. If you make a purchase I may earn a small commission, at no additional cost to you. I'll probably blow it on a cheapo pair of flip-flops or bottle of wine :-)
DIY Toss Pillows Made From Kitchen Towels, Tea Towels or Flour Sacks
Making your own custom pillow from tea towels is a perfect DIY project even for the challenged “home sewer”.
I use “home sewer” in quotes for a funny reason, because it describes me! A few years back I took an evening Adult Ed course in curtain making. I’m cutting right to the chase on this one…the instructor was, shall we say…rude.
After six weeks everyone in the class completed a set of balloon curtains. Don’t laugh, even home goods go through cycles.
On the last evening the instructor came around to inspect our work.
“Not bad,” she said to the first student, who beamed with pride over the floral balloon curtains she couldn’t wait to put up at home. Then came the boom: “For a ‘home sewer’.”
 CLICK TO SEE THE LIST
The instructor gave the same final critique to everyone as she handed out her professional services card. I guess should we ever wish to hire her.
Yeah…no.
I say this A LOT, but I rely on my seventh grade sewing skills to make home goods. (Shout out, again, to Mrs. Robinson). And in my DIY world, they are good enough to make pillow and plenty of other DIY projects, including balloon curtains!
So if you match (or better) my middle school home economics skills, you’ll find this is a super simple DIY project.
How To Make Pillows from Tea Towels
QUICK LINKS TO INFO IN THIS POST
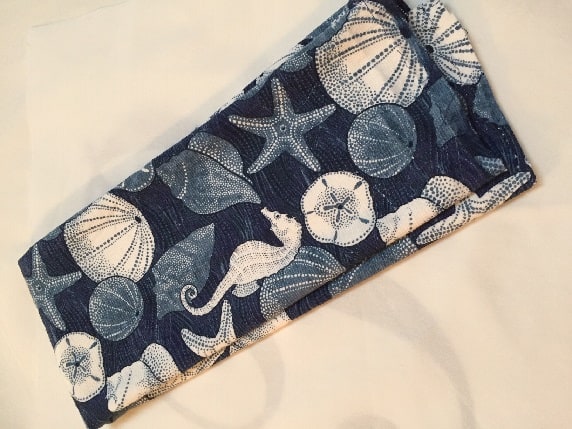 These seashell motif print tea towels became pillows for a coastal loving Bride-to-Be.
Shop for tea towels, kitchen towels (light-weight ones) or even flour sacks to sew toss pillows. Match the colors, prints and motifs to your color palette and home decor style.
Make your own piping, or purchase contrasting color piping, to give the pillows a more finished look. But honestly, to use it or not is a personal preference.
If you passed Zippers 101, consider sewing in a zipper to close the pillow. This will make washing soiled pillows a breeze. I don’t recommend using a zipper if you plan to stuff pillows with Polyfill stuffing. It’s best to reserve zippers if you opt to use a pillow form.
To clean Polyfill stuffed pillows you should be fine tossing them in a washing machine. Throw a tennis ball or CLEAN sneaker in the dryer with the washed pillow to fluff them up again.
If you have existing pillows that have seen better days you can recycle the pillow form. Just remove the covering. I’d suggest washing the pillow form first and fluff it in the dryer before putting on the new cover.
MATERIALS YOU’LL NEED TO MAKE A TEA TOWEL PILLOW
STEP-BY-STEP INSTRUCTIONS
STEP 1: PREPARE THE TOWELS
Remove any price tags or stickers. Wash and dry the towels, if you wish. Personally I don’t do this because I like the new “feel” and the crispness.
Iron the back side of the tea towels to smooth out any wrinkles.
STEP 2: POLYFILL STUFFING OR PILLOW FORM?
If using Polyfill Stuffing, you’ll use the towels as is. Making these pillows using tea towels and stuffing is the easiest and quickest was to create these.
If using a pillow form make sure the tea towels are large enough to cover the form. You may need to trim the towels to fit the form. For example, if the form is 12-inch by 12-inch then the two towels need to be that size as well.
STEP 3: PIN AND SEW TOWELS TOGETHER
Place two tea towels right sides together and pin together.
If using a zipper, install and sew the zipper. Then sew the remaining sides together.
Otherwise, using a sewing machine, sew a straight stitch along three sides, leaving one side open (to insert Polyfill Stuffing or Pillow Form).
Turn the pillow casing to the right side.
STEP 4: STUFF PILLOW
Insert Pillow Form, if using.
Or insert Polyfill Stuffing. Pull small handfuls of stuffing apart to fluff it up before placing into the casing. You’ll get a more firm pillow that will hold up longer. Be sure to stick stuffing into the corners.
STEP 5: CLOSE THE LOOSE END
Use a blind stitch to close the open end. Find video instructions on how to sew an invisible stitch on a pillow here.
Congratulations! You’ve just made a toss pillow from tea towels.
For step by step instructions on how to sew a zipper on a pillow, visit the Blog on fabric.com. There you’ll find four different types of pillows closures to choose from.
HOW TO MAKE YOUR OWN PIPING I actually watched this video on the Online Fabric Store as a refresher on how to make and sew piping for the trio of pillows.
If you love piping but don’t want to make your own, you can purchase ready made piping.
A Trio of Tea Towel Pillows
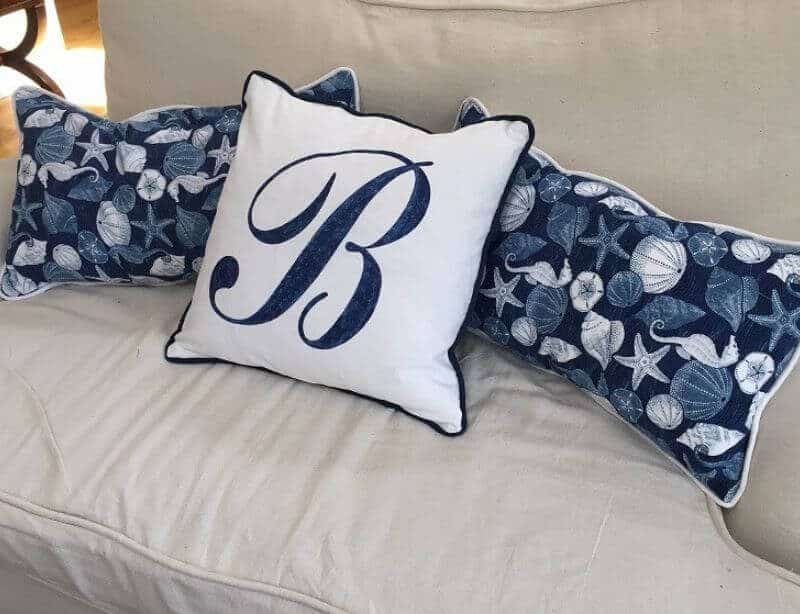
I made this trio of pillows for a Bride-To-Be friend. The two tea towels were a very thin soft terry cloth and I fell in love with the blue and white seashell motif design. The backs are the same white tea towels I used for the monogrammed pillow.
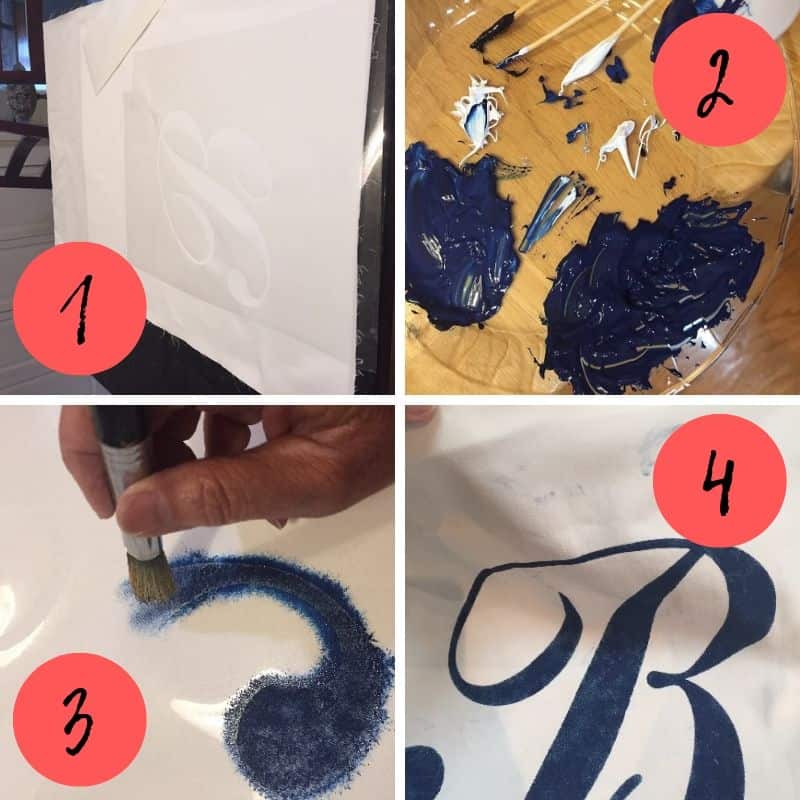
1 – The vinyl cut letter “B” a friend made for me on a commercial machine. Use a Cricut or other cutting machine if you have one, or ask a friend with one. Check Etsy for creative makers who make stencils.
2 – I mixed paint colors to get the faded denim look to match the seashells in the tea towels. Note: I used screenprint ink but fabric ink will work too.
3 – Then I dabbed the ink with a thick paint brush. Using a hairdryer I tried the paint until it seemed dry. I actually let it set overnight as well.
4 – After sewing the two sides together, I discovered the ink had smudged beyond repair. It might be hard to see it in the image but trust me, I came close to tears.
The bridal shower was the next day. I drove back to the store looking for more white tea towels. Then had to use a back-up stencil which had no adhesive backing. This meant I had to be EXTREMELY careful dabbing on the ink while holding down the stencil as I went around the curves.
Fortunately it came out well.
I taped the printed B fabric to a piece of cardboard and transported it to my screenprinter. We ran it through the industrial dryer 9 times. I wanted to be 100% sure that sucker was dry.
Before I sewed the two sides together, I pinned a sheet of parchment paper between them. Seriously…I was so paranoid. I was out of fabric. And time. If this didn’t work I’d be running to the mall looking for a last minute gift.
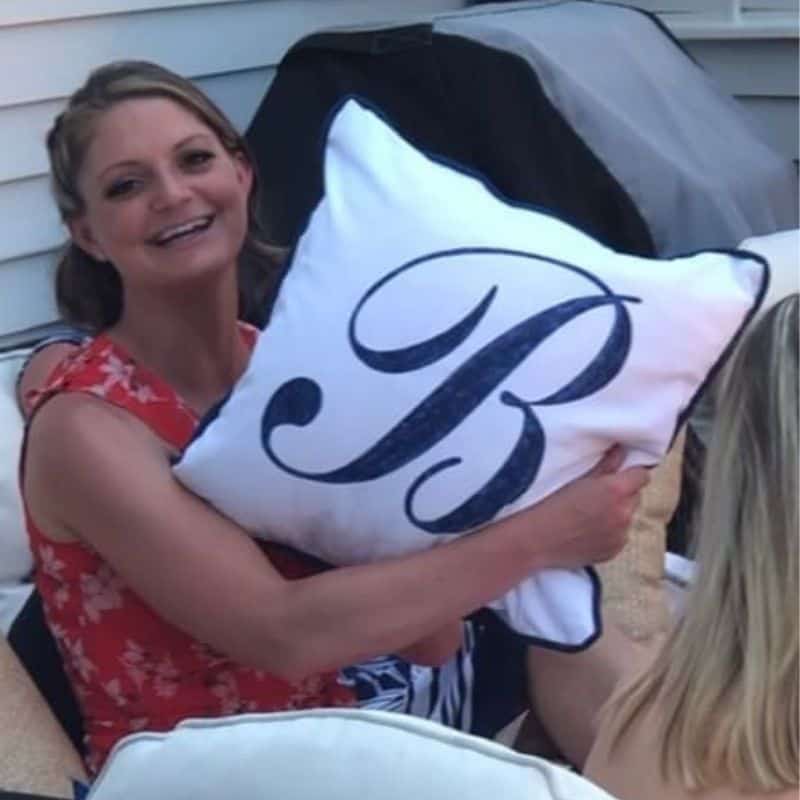 The happy Bride-to-Be with her monogrammed pillow.
In the end the pillows turned out great, and the Bride-to-Be loved them. Her smile is proof that it was worth the time to redo the monogram pillow.
Not too shabby for a “home sewer”!
P.S. We want your browsing experience to be a great one. Find an error, missing or broken product link? Contact me here and I’ll fix it. Thank you!
SAVE DIY Tea Towel Pillows to your favorite Pinterest Board.
WANT TO REMEMBER THIS IDEA? Please PIN THIS POST to your favorite PINTEREST BOARD!

Thank you for sharing the coastal love: